Glow Stone Installation Guide
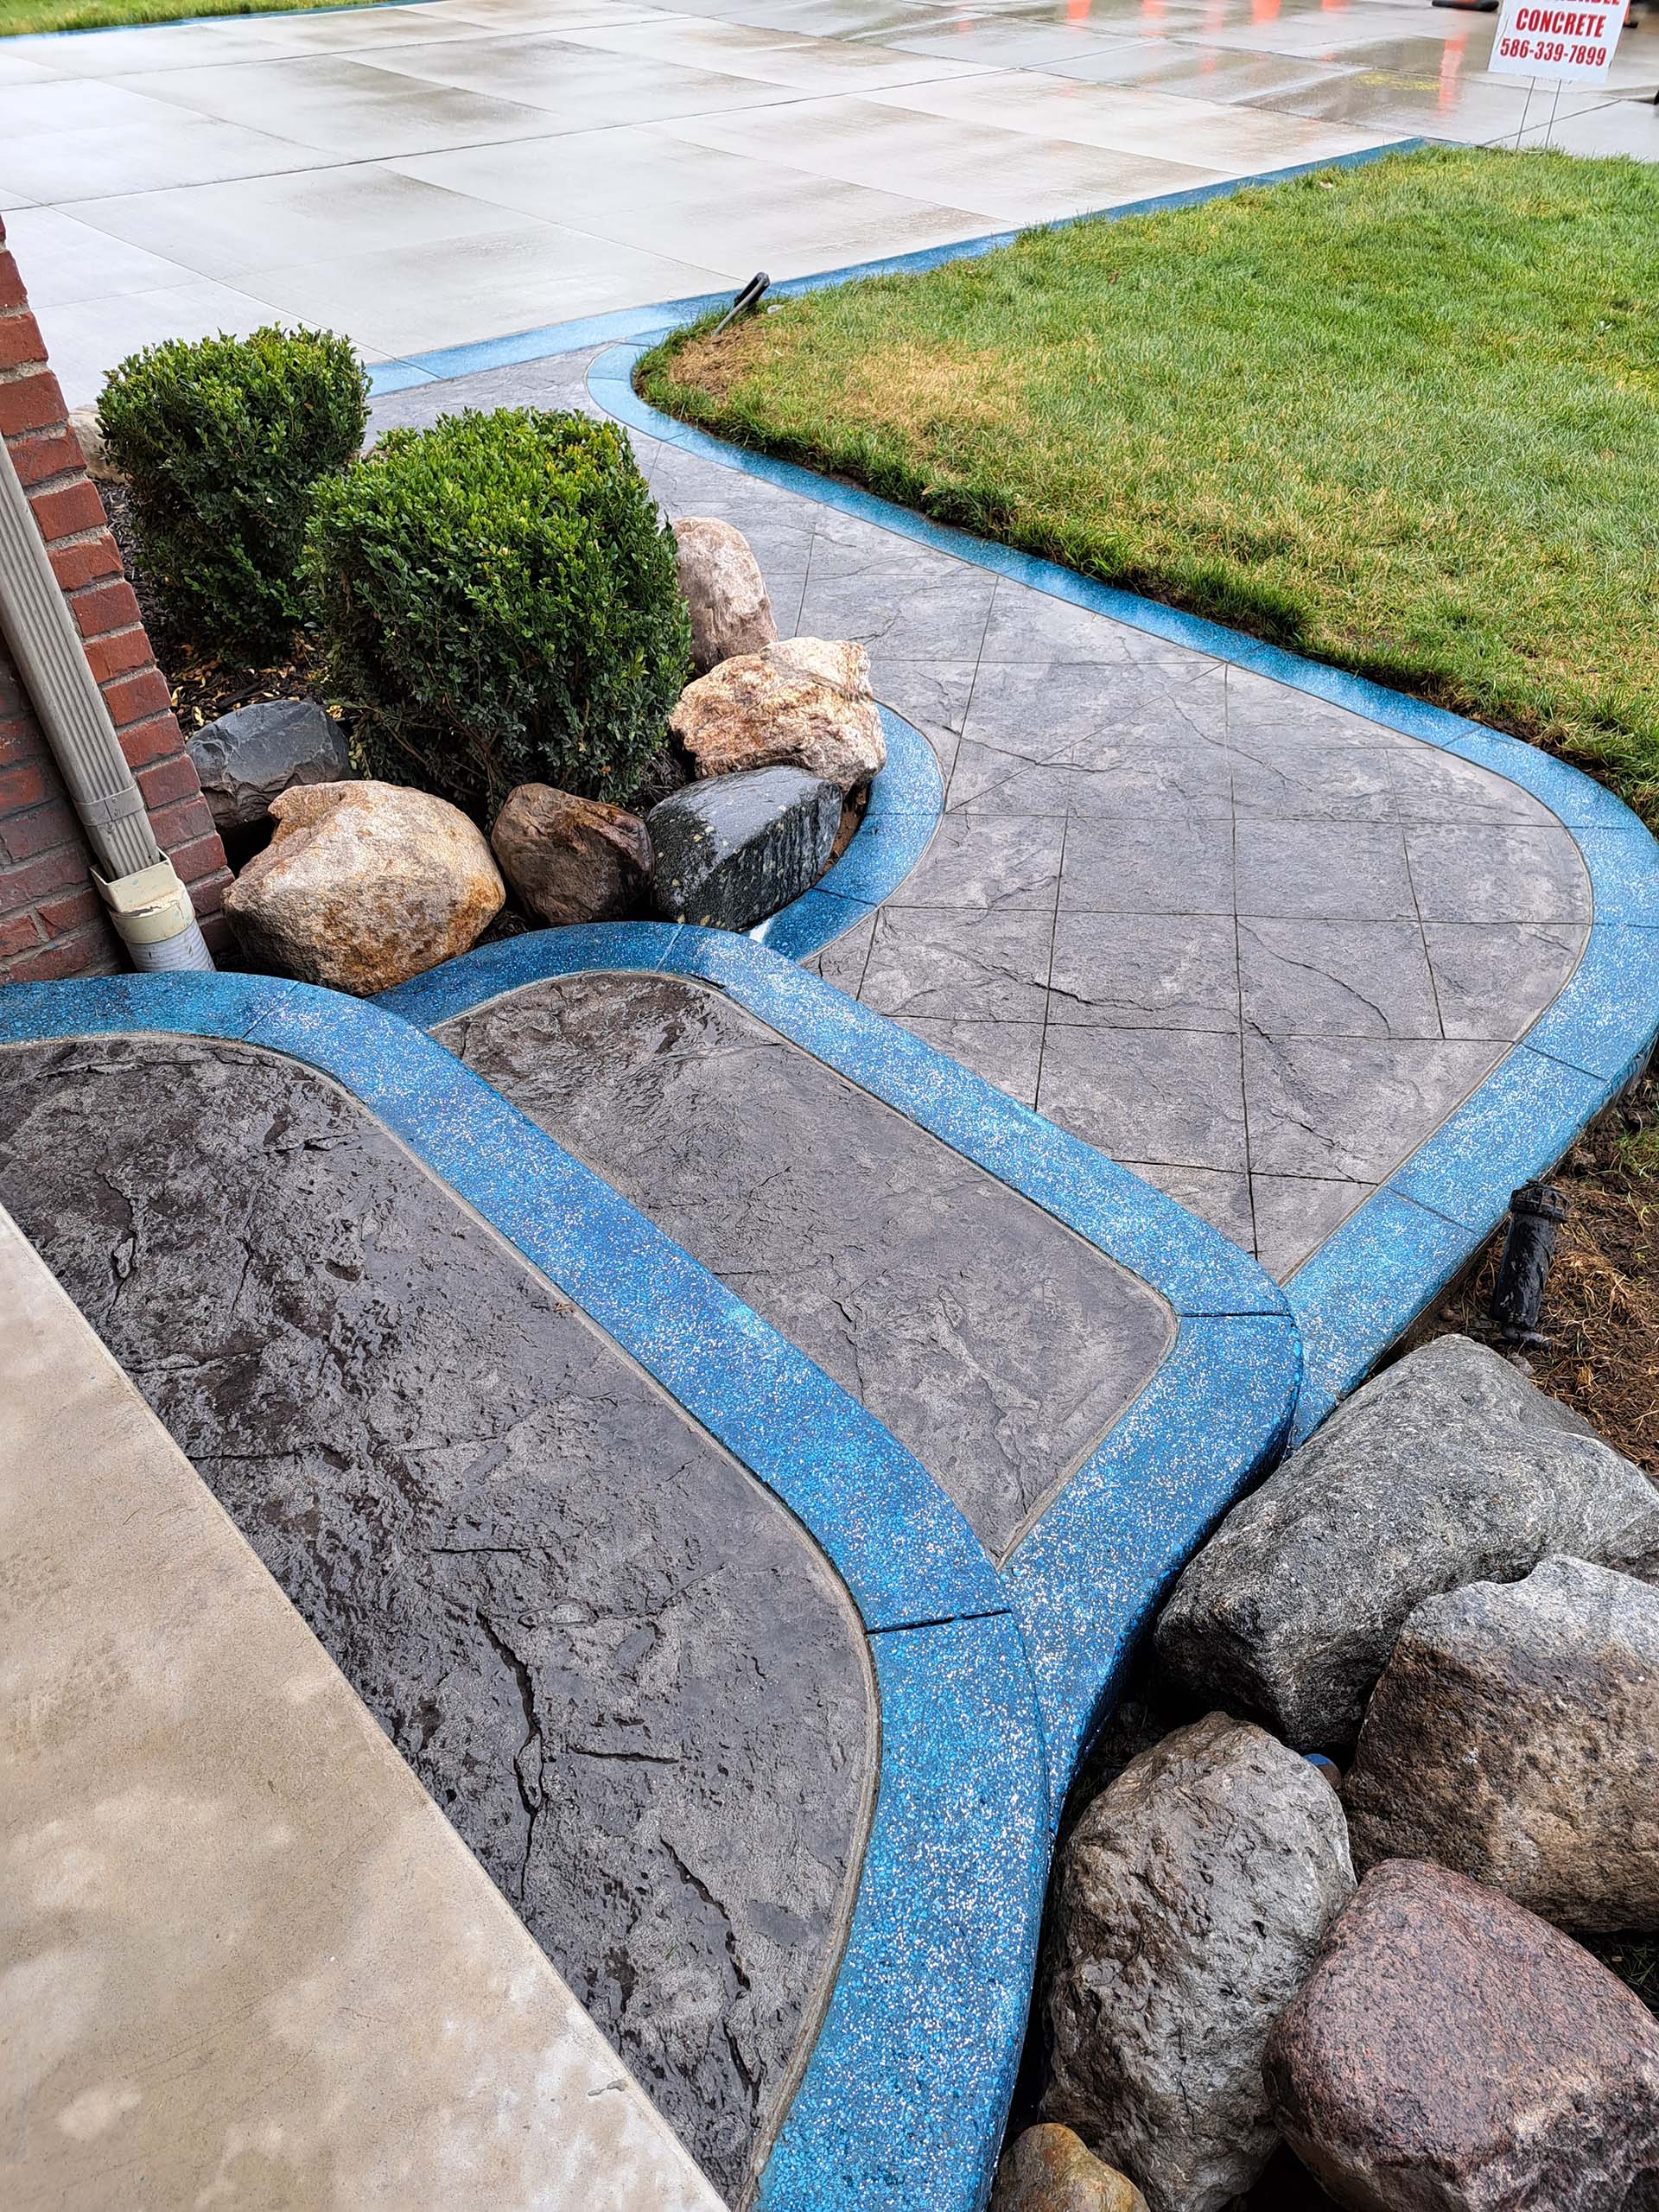
Exposed Aggregate Stamped Concrete

STEP 1

Pour the Slab

To start, pour the slab. You can add a base color to the mix to achieve any desired output. To enhance the strength of the area, add a fiber mesh, wire mesh, and small stones in the mix. Once the slab is poured and screeded you're ready for the next step.

STEP 2

Place in Aggregates

When the concrete reaches a specific consistency, it's time to place the AGT™ aggregates. It has to hit a certain consistency so that the glow stone can be floated into the slab without them getting buried in the wet concrete. The concrete consistency should be such that you can only press your finger into the the slab 1-2". Typically, you can hand place the aggregate sporadically throughout the area; however, the aggregate can also be arranged in a specific pattern design if desired.

STEP 3

Apply Release & Stamp

After placing the AGT™ aggregate in the concrete, apply a release over the surface and stamp the area. The release must be put down after the aggregate is placed, or the aggregate won't stick to the concrete. After stamping, scrub most of the release off.

STEP 4

Spray on Retarder

Please follow the manufacturer's instructions for the retarder regarding the recommended duration for leaving it on before conducting a pressure wash on the concrete surface. Adhering to these guidelines will ensure optimal results and help maintain the integrity of the concrete.

STEP 5

Wash, Seal & Enjoy

Once the concrete is cured (typically after 12-24 hours) pressure wash and apply the desired sealer. Then enjoy the glow!